 This is a simple and healthy side dish. That's all there is to it, really. If I ever need a quick veggie dish, I whip this up in a few minutes.
Ingredients:
- Cabbage
- Tomatoes
- Garlic
- Salt
Directions:
- Mince the garlic and set aside.
- Cut the cabbage into strips, about a quarter inch thick or so.
- Slice the tomatoes into thing wedges.
- Heat some oil in a pan.
- Add the garlic and stir for a few seconds, until fragrant.
- Add the tomatoes and a bit of water and cook until the tomatoes soften a bit. Adding a sprinkle or two of salt will help with this.
- Add the cabbage and salt to taste.
- Stir everything in the pan until the cabbage is cooked through.
- Enjoy this healthy side dish guilt-free!
Tuesday, April 27, 2010
Cabbage and Tomato Stir Fry
Thursday, April 22, 2010
Teriyaki Chicken
 When you order teriyaki chicken at a restaurant, it's usually just grilled (or even boiled) chicken smothered in teriyaki sauce. Not too exciting. I really like teriyak chicken, but just not when it's made like that. I like marinating the chicken in the sauce instead and then grilling it up. A light drizzle of extra sauce over to eat with the rice or veggies is fine, but I don't want it drowning in sauce.
So, this is how I make teriyaki chicken. Super simple, super delicious.
Ingredients:
- Boneless, skinless chicken thighs
- Teriyaki sauce
- Sesame seeds and green onions as a garnish
- Rice and steamed veggies to round out the meal
Directions:
- Marinate the chicken in the teriyaki sauce for a few hours (I tend to do it overnight)
- Grill the chicken
- Garnish the chicken with sesame seeds and green onions
- Serve it with rice and veggies
That's all!
Saturday, April 17, 2010
Vietnamese Spring Rolls
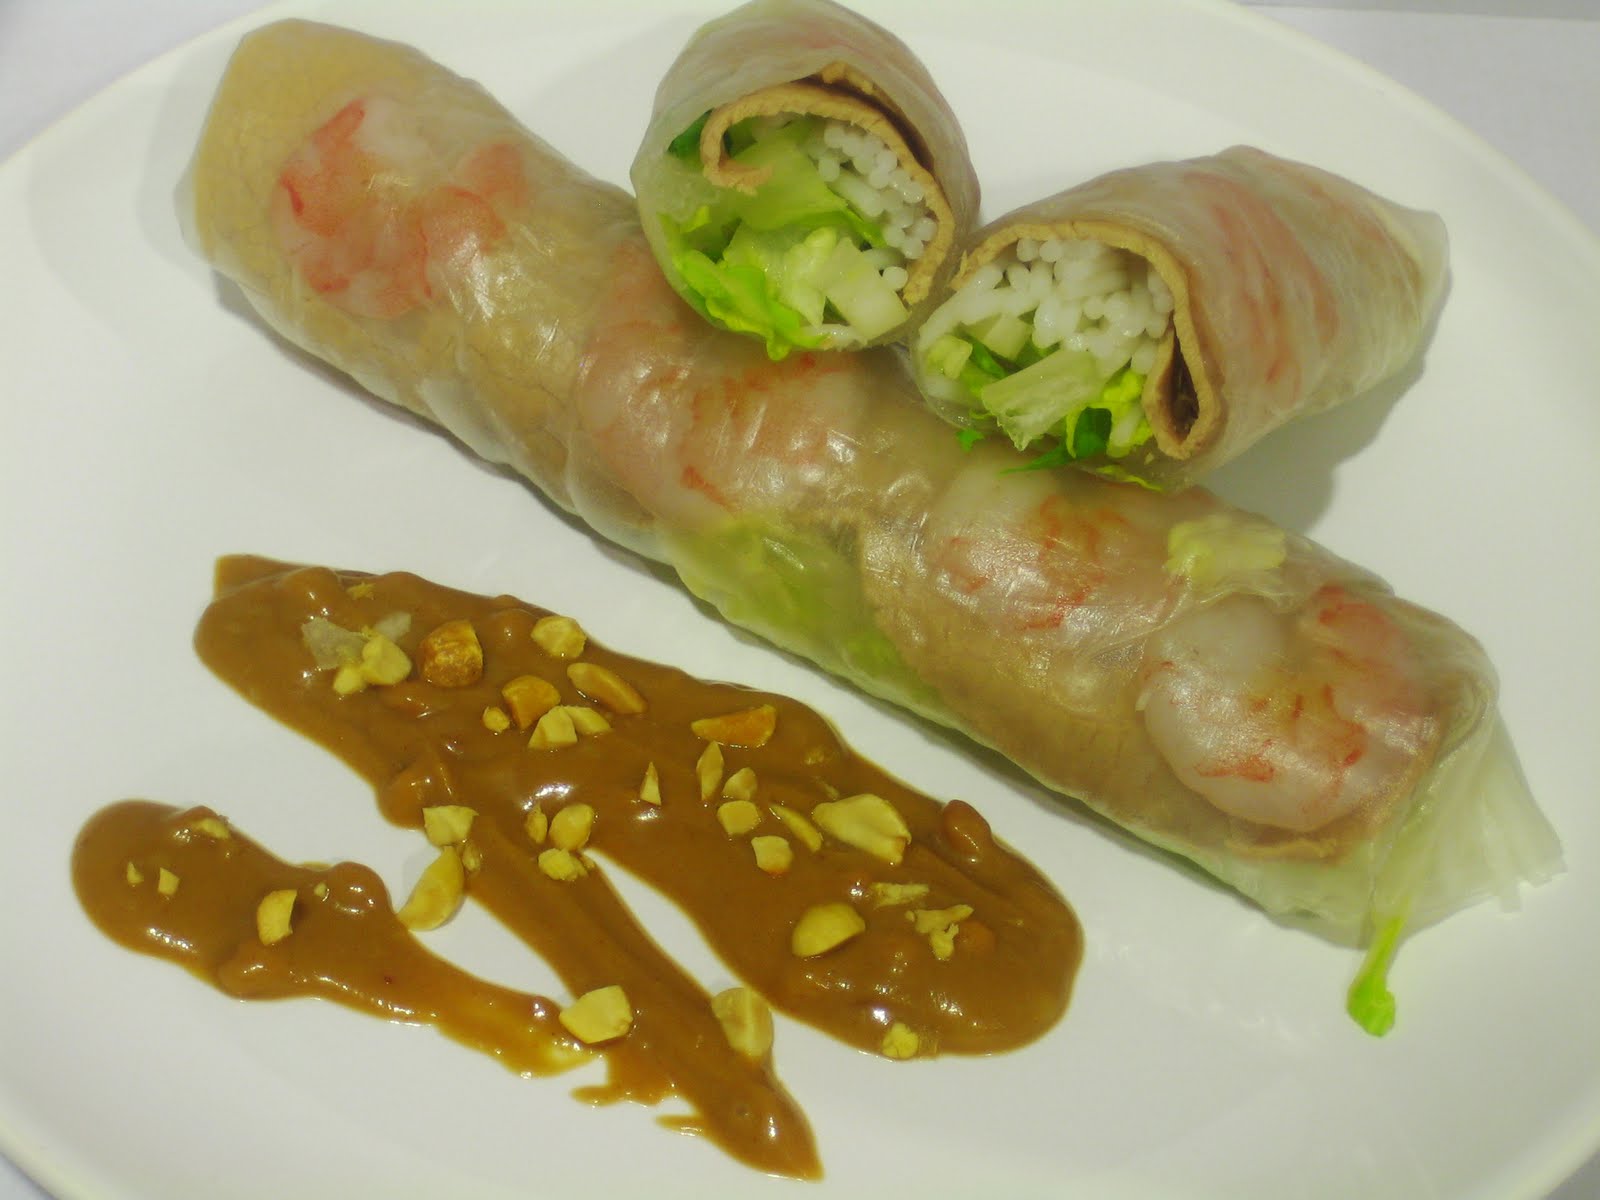
Whenever I go to Vietnamese restaurants, I always have an internal struggle between ordering the fried eggrolls and the fresh spring rolls. Usually, the fried ones win, but since the weather is warming up, this seems more fitting. And since this month's Side Dish Showdown has a theme of Spring, this seems fitting. Check out Cinnamon Spice & Everything Nice and the end of the month to see some other Spring inspired side dishes.
Ingredients:
(Rolls)
- Rice paper
- Rice noodles
- Shrimp
- Thinly sliced meat (I used eye of round that was pre-sliced for hot pot purposes)
- Lettuce
(Sauce)
- Peanut butter
- Hoisin
- Water
- Fish sauce
- Crushed peanuts
- Chili sauce (optional)
Directions:
(Rolls)
- Boil the rice noodles until fully cooked, then rinse it with cold water and set aside.
- Slice the lettuce into quarter inch strips and set aside.
- Cook the shrimp, then cool it, slice them in half if desired and set aside.
- Cook the meat, cool it, and set aside.
- Fill a pan large enough to fit the rice paper with water.
- For each roll, quickly dip two sheets of rice paper in the water (on both sides) and stack them on top of each other, flat on a cutting board. On my first roll, I let the paper soak in the water until it was fully soft. That was too soft and the rice paper fell apart. On my second, I just dipped it quickly, but found that it was still not enough because it'd rip when I tried rolling the spring rolls. Then I tried to dip two quickly and found that was perfect. You can experience yourself too, to see what works best for you.
- Lay a line of shrimp (pretty side down if you sliced them in half) on the softened rice paper.
- Lay a line of the meat on top of the shrimp.
- Lay a line of noodles on top of the meat.
- Lay a line of lettuce on top of the noodles.
- Fold in the edges and wrap up the filling into the spring roll.
- Repeat for each roll.
(Sauce)
- Scoop some peanut butter into a bowl and add a bit of water.
- Pop it in the microwave for a few seconds to help melt the peanut butter.
- Stir the peanut butter/water mixture until smooth.
- Add hoisin sauce and just a dash of fish sauce to taste (a little goes a looong way, so don't add too much).
- Add some chili sauce if desired.
- Stir everything together until it achieves the taste and consistency you desire.
- Top with crushed peanuts and dip spring rolls in the sauce.
Friday, April 9, 2010
Chimichurri Sauce
 Grilling season is back! That means less cooking for me and more for my hubz! I like grilling season :)
Instead of doing the standard grilled tri-tip that we do so often, we decided to make things a little more interesting by adding a nice chimichurri sauce.
We went to Argentina last year, and as much steak as we ate, we had surprisingly little chimichurri. But what we did have was fantastic! And now we don't need to fly all the way down there to get some.
Chimichurri is so easy to make and definitely worth the effort. If you've never tried it, I highly suggest you do.
Ingredients:
- Grilled tri-tip or other steak
- Parsley
- Garlic
- Oregano
- Olive oil
- Vinegar (red wine or something similar would be nice) or lemon juice
- Salt
- Pepper
- Red pepper flakes
Directions:
- Start with a nice piece of meat like this - In a food processor, blend the parsley, garlic, oregano, oil, vinegar/lemon juice, salt, pepper and red pepper flakes to taste.
  - Drizzle the sauce on the meat of your choice. Beef works best in my opinion, but I'm sure it tastes great with other meats too. Heck, just smearing it on some bread tastes great too!
Saturday, April 3, 2010
No-fried Beans

Like I've said before, we eat a lot of Mexican food at home. I used to buy cases of refried beans from Costco to use in our Mexican concoctions, but I decided to try making it myself. I figured it probably wasn't too difficult and that it'd be healthier and cheaper this way. I was right on all counts and haven't bought the canned stuff since. The only problem is that you have to plan at least a day ahead because the beans require soaking. I suppose if I skipped the soaking and just used more liquid and cooked it longer, that would work too.
We use our no-fried beans in burritos, tacos, nachos, etc, and add salsa and cheese to it for a tasty dip for chips, so even when I make a big batch, we end up finishing it all. If we ever have trouble finishing it, I'm sure that it would freeze well. Just freeze them into single serving size batches and defrost them as needed.
Ingredients:
- Dried pinto beans
- Water or stock
- Cumin
- Chili powder
- Onion powder
- Garlic powder
- Salt
- Pepper
Directions:
The day before -
- Rinse the beans and pick out any rocks or ugly beans.
- Fill a container half-way (or less) with the dried beans and then fill it to the top with water. The beans will expand A LOT, so give it room to do so. I learned this the hard way when I woke up to see that they had overflowed all over the kitchen counter.
Pressure cooker version -
- The next day, drain the beans and dump them into your pressure cooker.
- If you're using a pressure cooker, you don't need much liquid at all, so just barely cover the beans with liquid.
- You can add a bit of the seasonings if you want, or none at all. If you do season now, do so lightly. You can always add more later.*
- Cook the beans at full pressure for about 15 minutes. Then let the pressure come back down naturally.
- Open up the beans, if they're not soft yet, cook them for another 10 minutes. You don't really have to worry about overcooking them since they're going to be mashed anyway.
Crockpot/Other pot version -
(I've never done it this way, but I'm assuming this would work)
- Dump the beans into the pot and fill it with water or stock until they're covered by at least an inch.
- Add a bit of the seasonings (not too much though as the water will evaporate and the flavors will concentrate. You can always add more at the end)*
- Bring everything to a boil and then let it simmer until the beans are soft, stirring occasionally and adding more liquid when necessary.
Do for all versions -
- If there is still a lot of liquid left, pour enough of it out (but set it aside as you may want to add more later) so that the liquid covers the beans by about half an inch or less.
- Use a potato masher and mash the beans until smooth (or slightly chunky if that's the way you like it) while seasoning to taste.
- If the beans are thicker than you like, add some liquid. If it's too watery, you can cook it down a bit, but just remember that it will thicken up as it cools.
- Serve it in your favorite Mexican dishes!
*I've read that adding salt to the beans while cooking results in them splitting. I add salt while cooking and mine do split sometimes (usually just the ones on the top layer), but since I'm mashing them anyway, who cares?
Subscribe to:
Posts (Atom)


